Have you encountered this problem? Your printer was working fine and suddenly it is not recognized by your computer. I have tried every possible way to fix this problem. Maybe some of these are applicable for your device problem:
uninstall and reinstall the device driver
for printer problem maybe you can try replacing the usbprint.inf located at C:\Windows\inf by copying this file from another working computer.
Try another device and see if it works.
and the worst is reformatting your computer.
etc.
But before you try all of these, this simple solution solved my problem. Try to UPDATE your computer. This works for me! That simple...
So before you ask for a technician to repair your computer, try doing it yourself and save some cash!
I was working in my office when one of my co-worker asked me "Why all my desktop icons turned into Microsoft Word icon?" They asked me if they have to reformat everything in order to restore their computer to its original format, the answer is definitely "NO". Manually you can fix this problem easily. This is the easy way to fix this problem when you come to encounter it. Just follow carefully the following steps. I've done this on Windows 7 operating system.
1. Press Start and click on "Search programs and files" box just beside the Start button. 2. Type "regedit" (stands for registry editor) then press Enter. 3. When the Registry Editor window opens - click until you arrive at the last folder (which is the .lnk folder) HKEY_CURRENT_USER\Software\Microsoft\Windows\CurrentVersion\Explorer\FileExts\.lnk - then delete the sub-folder under the .lnk folder (note: do not delete the .lnk folder itself) In my co-workers computer I found this sub-folder "UserChoice" under the .lnk folder and its content was: " Progid REG_SZ Applications\Winword.exe " I think this means that all applications in your computer will use the Winword.exe to open. And that should not be the process. Delete this "UserChoice" folder. 4. That's all, close the Registry Editor and restart your computer and everything will be back to normal. Warning: You may ask help from a person with knowledge in editing the Registry Editor if your not familiar with it. You will create more problems if you deleted the wrong folder. Thanks and Hope you learn from my post.
On my blog last August 2013, I teach you how to share internet connection wirelessly. Maybe some of you are still wandering why some of you can't do this on your device. This can be done by first enabling the "Microsoft Virtual Wifi Miniport Adapter". I know some wireless card are not compatible with this, but if yours is compatible just follow this steps and your up and going...
In able to do this for Windows 7, click Start button / All Programs / Accessories and search for Command Prompt.
Then right click "Command Prompt" and click "Run as administrator"
Then right click "Command Prompt" and click "Run as administrator"
Once its open, type the following command: netsh wlan set hostednetwork mode=allow ssid=xxxx key=xxxx
and press Enter Note: Replace SSID (whatever you like to name your shared network) and key (must be at least 8 characters - this will serve as password for the network)
After that, you have enabled your "Microsoft Virtual Wifi Miniport Adapter"
Now you can go to my post last August 2013 and read the instructions on how to share your internet connection or watch the video below for instructions...
You’re sitting in front of your computer and trying to open some of your important files and you’re wondering why are all your files were turned into a shortcut icon? Well you were probably infected by a computer virus. Actually your files were not deleted, they were just hidden by the virus.
But don’t worry these steps will teach you how to restore all your files.
First click on “Start” and type “cmd” on the search box or just click “Command Prompt”.
The “Command Prompt” will open.
Now on the command prompt type the directory where your lost files are located.
Type “F:” for example if your files are on drive F.
C:\>f:
Now type the following command:
F:\>attrib -h -r -s /s /d *.*
and press enter.
It may take minutes depending on how many files you have.
Now check the drive using your explorer and wola, now you can see all your lost files.
First of all let me introduce to you what is Linux. Linux is a reliable, secure and flexible operating system. It's easier to use than most people think. It's easy to install and most of all its free. You can download different distros available on the internet. Linux distribution includes basic Linux operating system bundled with a number of free applications. Some of the free applications includes graphics and multimedia programs, fully featured office suite and many more. In these series of tutorial you will learn how to use linux and some of its basic commands.
The heart of Linux is the command-line interface. And here are the following steps that will teach you how to use it. As an introduction to command-line interface, these steps will teach you some of the basic commands needed to get around with what we call Terminal program. It is the standard command-line interface for Linux. Some of the basic commands I will teach you are pwd, ls and some of its options, touch, rm and clear.
Lets start:
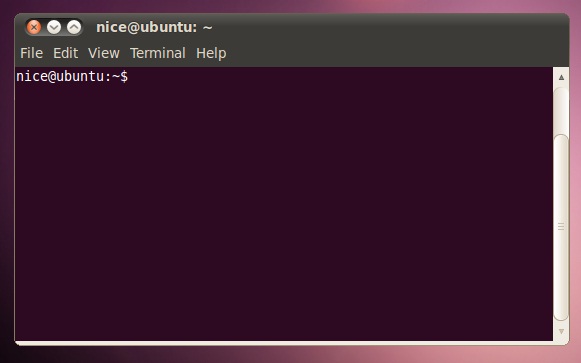
Go to Application > Accessories > Terminal
A terminal window will open.
First you have to know what directory you are in, in order to get around with the terminal.
On the terminal type the command "pwd" and press enter.
pwd -present working directory. Type this command and you will see the absolute path to your current directory.
Next command is "ls"
On the terminal type the command "ls" and press enter.
ls -lists all files in the current directory.
This command is versatile when used with proper options. Perhaps the most important option is
"l", which will list all files in the directory, including size, owner and permissions.
Lets try typing "ls -l" and press enter...
Some other options that can be used with ls command are:
-a Lists all files in the current directory, including hidden files.
-r Lists in reverse alphabetical order all nonhidden files in the current directory.
-i Lists files with inode numbers.
-t Lists files by the last time they were changed.
-F Lists all files by type.
-u Lists files by the last time they were accessed.
Next command is "touch".
touch -This command creates an empty file.
On the terminal type the command "touch myfile.cpp" and press enter.
A myfile.cpp file will be created on your current working directory.
When you run the ls -l command on the myfile.cpp file, you will see the following output:
Next is the "rm" command.
rm -remove/delete files and directories.
On the terminal type the command "rm myfile.cpp. This will delete myfile.cpp
Next command is
clear -clears the terminal screen.
Just type "clear" on the command-line and press enter.
Hope this simple command will help you in learning the basics of linux command-line.
These are easy steps on how to manually setup your computer to share your internet connection wirelessly. All you need is a desktop computer or a laptop with wireless adapter and a Windows 7 Operating System (note: does not work with Windows 7 Starter edition).
1. First let us enable ICS (Internet Connection Sharing) on WiFi adapter. In order to do this press Start, on the search bar type "ncpa.cpl" and press enter.
List of your wireless adapter should appear.
2. Right click on your wireless adapter and click Properties.
on Wireless Network Connection Properties click on Sharing Tab check the option "Allow other network users to connect through this computer's Internet connection"
and press OK.
A new Network Connection (Miscrosoft Virtual Wifi Miniport Adapter) will be created.
Right click this new Network Connection and choose Enable.
3. Right click your wireless adapter again and click Properties. On sharing tab select this newly created Network Connection on Home networking connection drop down box.
4. Now click Start and search for "Command Prompt" Right click Command Prompt and choose Run as administrator.
Now on the Command Prompt type the following...
netsh wlan set hostednetwork mode=allow ssid=xxxx key=xxxx
Note: Replace SSID (whatever you like to name your shared network) and key (must be at least 8 characters - this will serve as password for the network)
After that, type netsh wlan start hostednetwork and press Enter. "The hosted network started." message will appear on the Terminal.
Now get a Wi-Fi based device and scan for your newly created Network Connection and connect to it.
If you want to close the connection just type the following on the Command Prompt (again Run as administrator).
It's very annoying when virus hide your files. But do you know its very easy to recover these files?
Here's how...
First you must be sure that your anti-virus software is updated. Scan your computer and after that follow these step by step guide.
1. press Start
2. click Computer (for Windows 7) or MyComputer (Windows XP)
3. click Organize (for Windows 7) or Tools (Windows XP)
4. Click Folder and search options (for Windows 7) / Folder Options (Windows XP)
5. On Folder Options click View Tab
click Show hidden files, folders, or drives
uncheck Hide protected operating system files
6. then Open your USB Flashdrive (make sure you have already removed the virus using your updated Antivirus before opening)
now you can see a hidden folder like this
open or double click this hidden folder and you will see your lost files
7. select all your files and click Cut
8. then go out of that hidden folder and Paste it
Now delete the hidden folder and your done!
Note: Don't forget to go back to steps 2 to 5 and follow these...
- click Don't show hidden files, folders, or drives
- check Hide protected operating system files